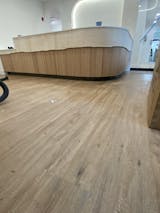
To install Tambour, make sure the surface is clean, dry, and strong, without any furring strips. The surface must be flat and free of dirt, grease, or loose paint. Heat the installation area between 65 and 80 degrees 24 hours before and after installation. Let the panels sit in the installation area for 24 hours (48 hours for solid tambour) to acclimate. If the material is kinked, roll it up concave and convex at the V-groove to relieve it.
For wall covering, use a high-quality construction mastic in caulking type tubes or trowel notch style adhesive. The adhesive and all surfaces must be at least 65 degrees before installation. Don't drag Tambour sheets across each other as it can damage the finish. Cut all panels before installation and "dry fit" to ensure a proper fit. Apply a 1/4" bead within 1/2" of all edges and a continuous bead across the panel every 4". Apply the panel to the wall, pull it loose, and reapply. Press and knead repeatedly to ensure good contact. Place a 3/4" board over the panel and hit it sharply with a hammer over the entire surface. Don't butt panels too tightly together to allow for expansion/contraction due to humidity and temperature changes during installation. Brad nails can be used to help hold the panel while the adhesive cures. You can then either remove nail or set nail and putty. Trim options are up to each individual project.
If you're using Tambour for applications other than wall coverings, PVA adhesives, epoxy, or contact cement may be appropriate. Different types of adhesives have been successful in bonding Tambour. In all cases, follow the manufacturer's instructions and recommendations for the adhesive.
Cutting
To cut Tambour, use standard woodworking techniques. We recommend using an overhead trim saw and a fine-tooth blade to prevent damage to the veneer or aluminum surface. If using a table saw, use a sharp carbide-tipped fine-tooth blade. Set the blade height to clear the Tambour and place a board on top of it, holding it down tightly to minimize chipping or lifting.
Finishing
To finish wood Tambour, use typical woodworking techniques. You can obtain sample material to test and create your desired finishing effect for your application. Refer to the finishing product's exact specifications and directions. If you plan to paint the material, make sure you stretch the panels by rolling them up concave and convex at the V-groove to allow for proper expansion and contraction. Also, ensure that the panels have acclimated before painting.
Maintenance
Tambour is a natural wood product and should be maintained like other natural woods. This involves applying a sealer (such as polyurethane, stain, clear coat, or paint) or moisturizer (such as Tung/natural oil finish) to prevent the wood from drying out over time. Always follow the product instructions and ensure it is meant for use on wood. To clean, use a lint-free cloth (preferably dry), but a lightly dampened cloth can be used if necessary. Follow all finishing directions regarding proper procedures and whether alternative cleaners can be used.


